Monday, January 30, 2012

Bored with a breadboard

(if you don't build, or have no interest in how I added the breadboard to my bar, this post isn't for you :-p)

I had no intentions to modify the plans that Ana had sent me for the wine bar.

None.

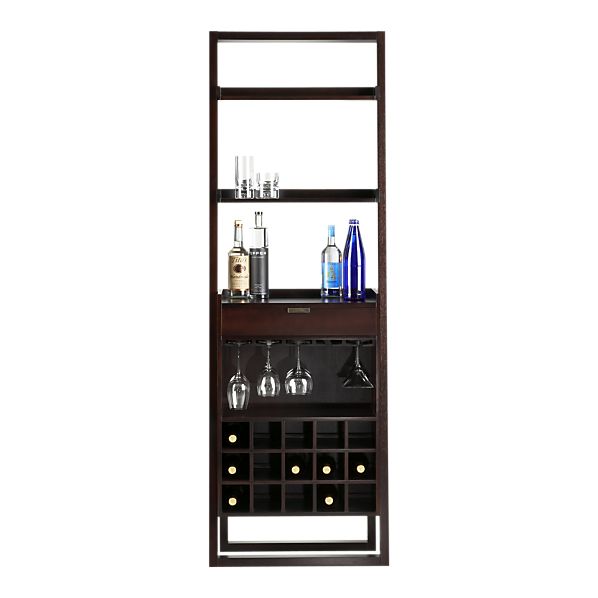
It was going to be a simple project that I could whip up to divide the living & dining rooms.

That's it!

But Mr. Goats had said that he wanted the breadboard that was like one one from Pottery Barn, and I couldn't get that outta my head. He doesn't ask for much, so I wanted to do this for him.

So, after I'd built the basic box, I took some scrap ply and started playing with it.


I created a "spacer" out of scraps to make up for the 3/4" lip at the top of the bar, the 3/4" the breadboard would be, and added an extra 1/8 ply for wiggle room. The side rails ended up being 13 1/4" (the width of my 1x12 + back trim), and they sat flush with the back of the "box".


Put it in place, and pressed the rails firmly against it, and nailed it in place. Then I slid the spacer down to the back of the piece and nailed again. 


Then I totally realized that this wasn't the best way to go about this. I was going to need something SOMEWHERE to stop the breadboard from coming all the way out, so I figured that I would attach a block to the back of it and a board between the rails. Don't know why I chose to measure 1 1/2" down from the front of the rail... but that's where it was.


Hopefully here's a shot that'll explain what I meant.


I also knew that I would need something on TOP of the board to stop it from slanting down as it was pulled out, so I used a 1x3 and scientifically figured where it would go by placing it at the top of the the box and drawing a line where the bottom of the breadboard would go. Yay for being precise! ;-)

(my breadboard was just my 1x12 cut 1/4" less than the width of the opening.. so I think it was 11 3/4"x 14 1/2" ish?)


Here's where you REALLY don't want to do what I did... I screwed the stop block to the breadboard before "installing" it. Um. You can't put it in like this! So I had to unscrew it, put the breadboard into it's "home", and screwed the stop block while it was installed. If you use glue here, you're not gonna be able to get it out.... So make sure you're all ready for this, or else you're not gonna be happy.


Here's what it looked like with the breadboard installed.

Now that all of this was finished, my breadboard was miraculously 3/4" inset from the front of the cabinet (because we KNOW I didn't measure anything :-p). Annnnd... I still had to figure out how to attach hardware....

So I cut a 3/4" strip from my 3/4" ply (essentially creating a 1 x 1), countersunk my screw head in the back, and attached the pull.


That got stained and nailed to the front of the pull-out... and it was done!

To accommodate for the space taken up by the breadboard and additional divider, I cut my drawer front at 3 7/8".

In the plan, the lowest divider (between the drawer and wine grids) was 5 1/2" down from the top divider, and mine is 5 3/4". And the wine grids slid JUST underneath them (I mean, NO wiggle room... it was perfect).

Anyhow, this was how *I* did it, but I think you can find many more efficient ways of doing this. If not, this way was super simple, and I didn't have to buy additional lumber!

Sunday, January 29, 2012

Divide[d] & Conquer[ed]


Meet my new bar!

Last week I was talking about how I needed something to "divide" the living/dining room visually, since the flooring just randomly changes between the two (thanks to us knocking the wall down). So I got my inspiration and asked Ana White if she could draw up plans for the Pottery Barn modular bar system. She, being one of the sweetest gals that I ever did meet, drew up some amazing plans and I got to building!

Do you guys see that wine grid?


I'm sorry, but that thing looks scary..

Wanna know something?

It really wasn't...


I marked out all of my cuts on the top board, clamped the boards together (after making sure they were perfectly aligned), and used my circular saw to make most of the cuts. The bottom boards weren't cut as deep as the top ones (because of the round blade), so I took my Dremel Trio and cleaned that up. Easy peasy! What took the longest was measuring and marking all the cuts!

In the plan, there wasn't a breadboard pull-out. Ana and I had discussed this, and it seemed that the easiest thing would be putting a board in the drawer that could slide forward to be used as a prep area and be pushed back to access the drawer, and I was more than fine with that... But Mr. Goats wasn't convinced. So I flew by the seat of my pants (something I dislike doing, and yet it seems to happen a lot...), and made it work. I'll save the details for another post :-)


Hey, I'll take an excuse to make a margarita ;-) Hey! It's for the pictures!!


The best thing about this is that it really DOES separate the spaces. And it looks pretty kick ass while doing it.. 


To keep things real, I decided not to clean off my coffee table before taking this wide shot :-p


There was a battery operated light on clearance at Lowe's that I had to grab and put in there. You can see it in the pictures, but it's a lot less intrusive in person. And the light in there totally adds some oomph to this bar.


And makes my dust more noticeable...


The cove moulding totally adds "something" to the piece.. So what if you can tell it's... uhh.. "homemade"..


(I bought enough to trim inside all of the sides, but I need my step-dad to help me with it. My dim self wasn't able to figure out how to cut it and make it look good... so that gets to wait 'til he comes down.)


This is one of my favorite parts, and the photos totally don't do this justice. I LOVE the trim along the bottom. There wasn't any trim that fit the bottom at any local hardware stores that was stainable, so I had to buy smaller trim and cut some more plywood to make up the front. I really just... love it...

Annnd... here are some more shots that I took. It's my new crush..


Plans are posted on Ana's site!

Saturday, January 21, 2012

Thirty. Six. Days. Later...

(pronounce the title like the narrator in SpongeBob does! Then we'll be on the same page ;-))

If you can believe it, we knocked down the wall between my living and dining room 36 days ago. And my lazy self still hasn't gotten the motivation to finish it... Not like you couldn't believe that, already...

So after the wall was taken down, the drywall patched in and mudded, I was left to do all the finishing touches on my own. Simple enough... I had to sand the drywall compound smooth, texture the walls, then paint! Ok! I GOT THIS!

Then there was a failed attempt at texturing, where the texture just looked like spit balls. Safe to say, I was a tad ready to just take some dynamite to that area of the house and call it done bummed. But I ordered a texture gun, and went to Vegas (no, I'm not cool enough to go to Vegas when I get bummed out - there was another reason for this trip!), and kept texturing off my mind.

And kept putting it off....

And kept putting it off...

And kept putting it off....

Until one of my amazing readers kicked my butt into gear, and reminded me that there ARE people OTHER THAN MYSELF who want to see this thing finished! (Thanks, Lisa!!!!)

So Mr. Goats and I spent Thursday night texturing the walls!


I first took the curtains down and then taped a few plastic drop cloths on both sides of the patched wall. Let me tell you that, if you ever plan on texturing, you're going to need a LOT more drop cloths. Like... fer realz.

Then I got the idea to tape off the full electrical outlet AND cover, rather than taking the cover off and risk getting drywall compound into the outlets (figured that if any compound gets on the cover, it'd be simple to scrape it off, instead of trying to dig it out from behind the hot wires).


And I put on my work clothes and got to work (warning, sexy beast ahead)


NOT! :-p

Anyhow, I had practiced on some cardboard in the garage, so I pretty much figured out that I needed to thin the drywall compound to a little thinner than pancake batter consistency, stay about 18" away and spray texture on about 80% of the surface. I sprayed the left wall, the roof, then the right wall, and took a 20" putty knife and lightly scraped it over the slightly cured compound.

The result?


I am happy to say that it's pretty darned close to the existing texture! MUUUUCH better results than with the can of texture!

So one one step closer to having a finished wall! Now we get to PAINT, PAINT, PAINT!

Spoiler alert:

My blue wall's GONE! :'(

Thursday, January 19, 2012

Divide and Conquer

I'm taking a break from above-the-cabinets because I'm kinda bummed with the outcome of one of my projects.

In the mean time, I'm trying to figure out the best way to visually divide my living/dining room (until I can knock the rest of the wall down, then it really won't matter because it'll be all nice and open, and there'll be uniform flooring). I think the random switch from carpet to laminate right there is just weird for now, and there needs to be some sort of division. I was going to just leave the pony wall there when we tore the wall down, but figured we might as well get that outta the way now.

GO ALL OUT!

(oh, side note! I get to try to texture the wall after the baby's in bed tonight! Super stoked!)

Here's the area right now.


Ok, right now the table's covered with grocery bags and boxes... so this was taken last year. It pretty much hasn't progressed at ALL... 

So I went through the house to try to figure out what I could use to visualize a few "dividers," and thought that my console table would be perfect! It was just a tad shorter than the previous wall that was there, but still open. 

And then I tried it....


Yeah, no. 

Totally looked stupid. And then "closed off" the open area that I was sooooo diggin'. So then I got this bright idea to just put something against the wall, like a wet bar or something... It didn't have to be this big, wall-like division. Just something to say "this is where the kitchen starts, so the flooring difference makes sense!"

And then I started looking up bar towers to get an idea of their dimensions, and found some really great options!


 The one above is from Crate & Barrel, and I just adore it! But I looked some more and found this from Pottery Barn.


 Wow!

I. Just. LOVE. That!

So I checked it's dimensions, and tried to find something in my house that was mildly close so I can visualize how it would look in the space.


Yes, that is the box my vacuum came in.

SOLD!

I think it did an AMAZING job keeping the open feeling, but still justifying the flooring change. And after the wall is textured and painted (the blue's going :-( I have to think of another wall to paint that beautiful color), it's going to look great! I... just have to BUILD it (because we all know I ain't payin' PB prices, right?!).

And if all goes well, I should have a post on how annoying wall texturizing is ;-)

What are your thoughts?

Thursday, January 12, 2012

"Go bold or go home"

I was given this advice yesterday by Ms. Lisa!

She was saying that I need more color above the cabinets, and, while I agree with her (color would REALLY be nice)... I'm thinking that adding two big squares of color up there would have the effect of just adding a big picture, and make the space feel smaller.

Luckily, I can throw the photos into Photoshop, and continue being a lazy bum while still trying to figure out what to do.

Here's the same messy kitchen picture from yesterday, but with blue canvases.


Though I feel like this could go unsaid, those are not the shapes I would be using, ultimately. They're some free brushes I got for Photoshop, since I didn't feel like finding the utensil silhouettes again.

Ya know... That really doesn't look that bad! I was thinking that I would go very neutral and tone-on-tone up there, to keep the open/airy feeling... but maybe a lighter version of that blue (which I conveniently used my eye dropper tool on the towel to get) would be fine! I know you can barely see it, but the box on top of the cubbies is a vintage Kellog's tin that's pretty much the same color.


My only problem, then, is that I was planning on taking the shapes that I cut out from the dining room wall art, painting them the same blue (they're actually painted already), and hanging them on the wall to the left of those. So that may be too much blue!


So I figured I could try to figure out what it would look like if I used my 50% tinted paint (a lighter version of the wall color behind the pictures) would look like with blue silhouettes.


And decided that I hated it (if you unfocus your eyes, it looks like a crying pig!).


So I could either go the blue route, continue with the blue silverware, and have a crap ton of blue up there... Paint the silverware a different color (still have metallic silver left from the jacks), or keep them white with blue silhouette shapes.

What're your thoughts?

Wednesday, January 11, 2012

More trivial decorating above kitchen cabinet posts... Excited?

Yes, we're going back to my kitchen for a while. Remember how I totally thought I'd figured out what I was going to do above my kitchen cabinets

Well, that was about as far as I got. I haven't done anything else up there since August.


This is how it looked until last night (aside from me painting the lids of the milk bottles on the left). 

I was standing at my table, thinking, "Man, I REALLY need to add something up there!"

And then I remembered that my sister suggested adding more silhouettes (maybe to mirror the dining room wall art which is on the wall directly behind me when I took this photo?) symmetrically to fill up the big, empty spaces above the outsides of the cubbies.


So I taped some paper together in the dimensions she'd suggested, and then taped them to the wall.

And immediately hated it. 

I couldn't tell if it's because it was too busy up there, if the paper was just too white, or if I just wasn't used to it.

But my friend said she liked it, Mr. Goats said that HE liked it, and my sister said... "it would be fine"... 

And then she suggested that I make them bigger!!!

Ok, not quite what I was thinking... I thought it just looked like there was too much up there and adding MORE wasn't where we should be going with this. But I stared at it long enough to convince myself that they should be a little bigger.

So I got back up and taped more paper.


And decided that I liked where this was going. Oh, and if they seem "off" to you, don't question your eye sight. It's totally me. I'm a master of not hanging things evenly. 

So, while I'm still not positive that this will be what I ultimately put up there, I figured I'd at least play around with it. I've got some more options to consider, like if I want them to be white or a lighter version of the paint color behind it, what color I should paint the utensils... and even which utensils to use!


Should I do a whisk and a cork screw?


A rolling pin and a cork screw?


Or totally be lame, and throw a shopping cart up there?!

(totally kidding about the cart - it was a shape in Photoshop... and they didn't even have any utensils! What IS that?!)

So I think I'll sit with this for a couple days, and paint the wall to the left in the mean time, so I can figure out what to do up there.

What are your thoughts? What do YOU do above your kitchen cabinets?

Tuesday, January 10, 2012

Zebra Shelf

I've been trying to figure out how to contain the big kid's backpack/shoes/jackets when she comes home from school. If you've got kids in school, you probably have the same problem? It lands in a pile. By the door. And it's not pretty.

But there's no real place to PUT it!

When I saw Ana White's Vintage Shelf with Hooks, I literally ran outside to gather scraps to build it. She posted it mid-day, and I had it built before the little kid was in bed (she goes to bed SUPER early). It was THAT easy.


The kid is in LOVE with cats and zebra print. Not that you couldn't tell....


I bought these hooks at Lowe's for about $3.20 for both. That was the total amount spent on the project, since I had everything else.


And I suck at distressing, but the kid's been in love with like EVERYTHING at Hobby Lobby, so I tried to match it.

I hung it at kid's console table height, so she can hang her junk on the hooks, and throw whatever she wants on top.

For now, it's cats.

Sunday, January 8, 2012

Junk in the Trunk

I was packing before our flight to my sister's house in Vegas, and couldn't shake the feeling that I should take my Kreg Jig. If my sister decided to randomly ask me to build something for her, I didn't want to be stuck without it.. But I didn't wanna take it if I didn't have to (visions of me mindlessly throwing the bit into my purse and then trying to get through airport security with it kept running through my head).

Here's the bit, if you haven't seen it. It's about 9" long and 5/8" wide.

Yeah... I could get that through security....

Without being tackled...

Or, more scary, having them take my bit from me....

Hmm.. I had to ask if she wanted me to build something. And the answer wasn't surprising. She did.


Pottery Barn's Emmett Trunk, to be exact.

So eleven hours before my flight was scheduled to leave, I started to sketch-up the plans for this trunk and sent them over to my sister for approval.


(do you see that price? Yeah, this trunk is sold for $599)

The only thing left to consider was the amount of distressing she wanted, but that could wait. I made sure to put the Kreg bit into my checked luggage, threw my shopping/cut list into my purse and made my way to my sister's house.

Our first day there was spent overbuying lumber at Lowe's (I totally screwed up the shopping list) and pre-cutting the boards. Since we didn't have a chop saw, or a way to quickly, accurately cut the boards to size, my idea was to cut and assemble planks and then cut the whole plank to size (so all the boards matched).


Since I had a bad experience with planking boards without staining before-hand (you can totally see the unstained parts between the boards), we stained the sides of all the pieces after cutting them, and then called it a night.


I kicked myself the next morning for not pre-drilling all of my pocket holes, but eventually I got them all drilled and the top and sides planked. Here's where I have to throw in a little giggle-worthy fact: At the start of the day, my step-dad declared, "We should have this all assembled in about 2 hours."

Uhh... If we do enough furniture together, he'll realize that it's not as quick as throwing up a house (how sad is that, btw?!).


Somewhere along the lines, we decided that we were going to steal some hardware off of my sister's entertainment center.... So some pieces had to be modified.

Sparks were flying, and it was COOL.


I'll totally over-simplify the process, and say that my step-dad "got 'em to work". There were a few trips to Lowe's, and a few Dremel bits bought between the above pictures... But all of the hardware works like a charm!


A quick coat of stain later (much more quickly than it would've been if we had to get between all the planks, at least), we thought we were almost done.

Until my sister pointed out that we hadn't done the trim yet.

Whoops. Simple fix.


(my New Year's resolution was to take less pictures with my cell phone for my blog - guess it'll take time)

So it got trim.


Some awesomely distressed trim, might I add....


I had major issues getting a decent picture of it before we had to leave (talk about deadlines), but this piece is just BEAUTIFUL.

And heavy.

And BIG!


(stow aways! FOUR of them fit!)

And you can build it! Plans HERE!