Friday, October 25, 2013

How to Make an Enderdragon Costume

**UPDATE** I've added a tutorial for articulating wings! So after you check out this how-to, click here to check out the new wings!

*****

If you have a school-aged child, chances are they know about a game called Minecraft.

If you have a child that loves Minecraft, chances are they want to be a Minecraft character for Halloween.

If they want to be a Minecraft character for Halloween, chances are you got one of these and called it "done".


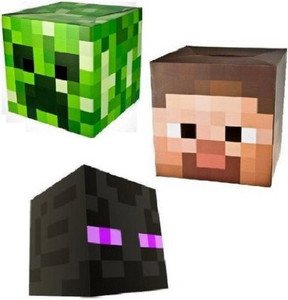
If you got one of those and called it "done", chances are you are a lucky, lucky parent....

The big kid got an Enderman head for her birthday, and quickly changed her mind about what she wanted to be for Halloween (remember, back in May, when she decided she wanted to be a Minecraft Skeleton? And how I made a bunch of Minecraft weapons for her costume..?).

She decided that, since she had the Enderman head, she wanted to be an Ender Dragon!


Because, you know, she's like her mom and can't make anything easy....

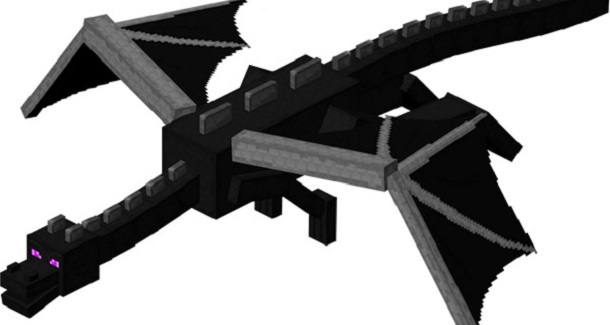
So here's how to make an Ender Dragon costume from a store-bought Enderman head!

I had to find a box to act as a mouth, and I cut 10 1x2 blocks at 2 1/2". I also got a yard of black fabric, and black, gray, and white paint. The big kid also had a black shirt and pants.


It's really simple. Just paint the mouth and two of the 1x2 blocks black (if you can't find a box the right size for the mouth, you can make a square from poster board - 2/$1 at Dollar Tree and Wal Mart). OH! I chose to make a closed mouth, because having an open mouth on a running child doesn't seem like a good idea to me (it'd flop about and probably come off!). 

Paint the rest of the blocks gray. 

Glue the mouth onto the head and glue the black blocks onto the nose. The grey blocks are glued to the head, the shirt, and if you want to do more... well... you'll see in a sec.


I used the picture of the Enderdragon above as a reference. 


Now, with the yard of fabric you bought, make the wings!


Safety pin those onto the black shirt and glue two of the blocks onto the back of the shirt.

You can call it done there.


But was I...?


No! The big kid wanted a tail! 

So I sewed a tail, using this tutorial.

This actually isn't the first time I've sewn this tail.


The big kid wanted to be the Big Bad Wolf for Kindergarten Fairy Tale Night (you know, where most girls want to be princesses or fairies?). 

Glued some gray blocks onto the tail, and safety pinned it to her pants (it has a belt loop, but the Big Kid doesn't have any belts!). 


And this, m'dears, is how you make an Ender Dragon costume from a store-bought Enderman head. 

If you can't find an Enderman head, here's a tutorial for making one! 

Baby Goats also decided that she's not going to be a Minecraft Zombie, but a Red Angry Bird.

Here's a quickie tute for how I did their Trick-Or-Treat bags.

Supplies:

  • Cheap canvas bag (many different colored ones at Dollar Tree)
  • Sharpie
  • White paint (optional)


What I love about this is that you can use this idea for so many costumes! A red bag with an elmo face, or a pink bag with a crown painted on. It's so easy, I really don't know why I've never done this before!

Have you finished all Halloween costumes yet? I can't believe it's already next week! Are you dressing up?!


DIY Minecraft Weapons


Enderdragon pinata

Tuesday, October 15, 2013

1 bed, 2 days

The title of this post doesn't quite have the same impact as the one from the last time I built a bed using this plan ("2 beds, 3 days" for those just-as-lazy-as-me people that don't wanna click over), but really, I built a bed.


Whoop!

(Fun fact: I have now built every bed in my house - including doll beds! And the grand total for all of the beds in my house is under $500. That's 2 twin beds, a Cal King, a doll bed and a doll crib.)

We had a crib that converts to a toddler day bed, then to a twin headboard for Baby Goats. She loooooooooved her crib (to the point that she would ask us to put the crib side back on daily), but she was just getting to big for the standard crib mattress. Sure, we could've gone out and bought a metal frame and popped a mattress on it and called it done... But I don't ever make anything easy, do I?

Then I learned that one of Mr. Goats' friends was on the search for a crib, so I told him to see if they'd want to buy ours (thought process: sell the crib, use the money to build an awesomeR bed!). My evil scheme worked, but I dawdled on building the bed.

Uhh, HELLOOOOOO? I'm still doing Halloween decorations!

All of my dawdling caught up to me, and I was told they wanted the crib in a week.

Crap.

We had a 3 day trip to San Diego planned, I still hadn't packed for it, and there is no way I was going to build a bed the day we get back (road trips = exhausting). That meant that 5 days were already spoken for.

Luckily, Baby Goats picked a bed I'd already built before!


I did the same thing that I did last time, and bought two sheets of plywood for the bed. This time I used Purebond plywood because I now know of the formaldehyde that lives in plywood, and Purebond is not only formaldehyde-free, but probably the most beautiful plywood I've ever seen!


I also made the footboard an inch and a half taller and the headboard 4 inches shorter. These proportions appealed to me more than the original plan.

Two days after starting my project, I had this.


This wasn't assembled, just propped together for the picture, because moving an assembled bed into her room would have been impossible.

So, the bed was built and all was well with the world.

Except that it wasn't.

See, Baby Goats had told me when deciding on her bed that she wanted a white bed. Right before I was to begin painting, she decided to change her mind and request a blue bed.

Yeah, no. I had the white paint and was ready to DO this (remember my deadline?). So we made a deal! She was going to have a white bed, but she could have a blue room!


She slept in a pastel blue/purple room that night. The next day, she said she wanted the room to be the color of a lantern (which ended up being Valspar's Bayside).


And after the initial shock to my system, I love the color!

And... I know it'll be a little less shocking when I get some decor on her walls.

Wait, lemme post this once more.


Find the plans for this bed here.

Have you had any deadlines sneak up on ya? Was it the most holy-cow-make-it-work moment of your life?

I think this one's "up there" on mine!

Wednesday, October 2, 2013

What Sucks About Changing Things

I think we all know the feeling. You paint something or buy something new, and suddenly! All of the "old" stuff looks... old. Or the new and old clash. And you can't just leave it!


My little graveyard has been... little. The crosses were little, the fence was little, but the scale of every-little-thing worked. 

Then I brought in these guys, and my teeny tiny wooden fence just didn't work anymore. 


So I had to come up with a new one!

(excuse the crappy picture - I can't find my memory card)


Which is just PVC pipes hot glued together, and the columns are made from 1x1s and foam board from Dollar Tree (all repurposed, so no out of pocket cost for these - still have to build "caps" for them!). 

Then, this fence needed *something*, because it just wasn't cutting it....


So I dismembered a $10 skeleton (was actually $5 because I bought it when the Halloween stuff was 50% off at Michael's) and reused some chain from a 99C Only hanging prop and created lantern holders. 

Because of the new cemetery and fence, I wanted to find somewhere to display the OG cemetery. 

It's not that I'm sentimental... But they're so crummy, I can't even give them away. 


I put them in a small "nook" in the yard, that actually houses them quite nicely! HOWEVER! This is where I put the large coffin that I built last year...


So I now have a homeless coffin... 

All this because I wanted new headstones. 

Have you replaced something recently that created a whole list of to-dos? Was it holiday-related? Do share!