
I've had this idea percolating for a few years to host a small building-workshop and finally got to make it a reality.
There were a couple of reasons this idea hadn't been shared, but the biggest reason was just that I don't have enough tools for multiple people to work with at once. After that was put out there, we'd decided that this was going to be a Bring-Your-Own-Drill workshop, and somewhere along the lines, I'd decided that we'd build benches (pretty sure the logic was, "Who can't use an extra bench?").
It ultimately ended up being a group of four ladies that would come over and build benches. I gathered a few benches from the interwebz to propose to them and they ended up choosing three different benches.
One was building this

Two were building this
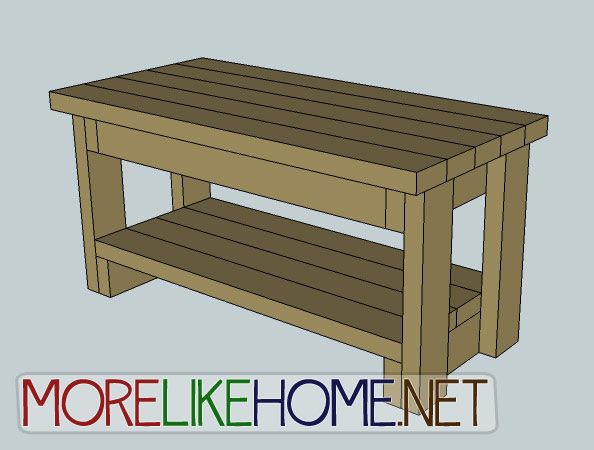
And the other one sent me this screenshot and asked if we could do this.

I had to draw up the plans for the final bench (and mention that we wouldn't be doing the hardware that day), but it was probably the simplest of the three.

After deciding on benches, I did a lot of the prep work in the week leading up to the workshop. That included buying all of the lumber for all four benches, [under]estimating how many screws we would need, printing out and making notes on the plans, reminding the ladies to charge their drills, making nearly all of the cuts, pre-drilling most of the pocket holes, and getting all of the tools we would need prepped in the garage (if it sounds exhausting, it was!).
The morning of the workshop, I was ready!

Well, other than not having bought enough pocket hole screws, but I wouldn't find that out for a few more hours.
Everyone got their plans and a pencil, some wood glue, a cotton rag to clean up any excess of wood glue and a tape measure.

In addition to what you see in that photo, I had prepped snacks and water bottles because building furniture takes a lot of effort.
When everyone was here, I went over a couple key points that you may not think about if you haven't worked with wood before (covered that they shouldn't rub their hands along the wood in case of splinters, glue spills should be cleaned up with a wet rag, etc.). At this point I'd also passed out everyone's lumber and had them look through the plans to get a general idea of how things are going to be put together.

Dry-fitting the pieces seems to be a natural part of the building process (and it was so awesome to watch!) because everyone immediately picked up wood and started to try to place it where it should go. Some of the gals' pieces from step 1 weren't cut yet, so I had them man the saw.
Key points to cover (in addition to mentioning that they should have hearing and eye protection - which I didn't provide - bad, bad Gina!) were to start the saw before putting it on the wood, keep the blade spinning until it was lifted, and to keep fingers far, far away from the blade.

They rocked it.
Drilling screws into lumber (even if the holes are pre-drilled) was something that I'd forgotten wasn't easy. There's a pressure that should be applied, and when the screw "bites" into the adjoining lumber, it jerks a little. Little things like this were fun little lessons we got to work in to the workshop. Even towards the end, I had to tighten the screws because I had more of a "feeling" on how they should be than the builders.
They got comfortable enough to help each other when I was busy with someone else.

And mastered tools I hadn't even planned on them using.

That's Nicole. I hadn't pre-drilled pocket holes to attach the seat and shelves to in the More Like Home bench plan... honestly, I'm not sure why I didn't, but she got a little instruction on how to do it and rocked out all of the pocket holes for her seat and shelf.
For the record, this is a perfect example of why you should have a Kreg Jig Mini on-hand. Would've had to disassemble this to pre-drill those holes if I didn't have it.

Most of the Upholstered X-Bench was assembled with the nail gun. I think Linda got a little trigger happy, but her bench turned out ahh-maz-ing. This was the last bench that I'd started the prep-work on, and I waaaaay over-thought the plans (don't believe me? Click over to the plans and read the comments! I was pretty NUTS). They were accurate (of course) and super easy to follow... So I'm thinking i may build one of these! LOVE this one.

Shelby, givin' her bench a good sanding. This is going to look stunning when the hardware's put on it.
STUNNING.
And here are all the ladies with their finished benches!

And here's a photo of all of us garage-buddies, dogs included.

Left to right: Linda, Edna, me (Gina), Nicole, Shelby
And up front is Luna and Percy, the fur-legged helpers.
If you'll allow me to share some tips that I've learned from this, the biggest I can give is to choose a smaller project! I think I threw these ladies in the deep in with this and, while they swam, it would've probably been a little less overwhelming at times if we'd have done something like a bird house or a picture frame.
Another thing would be to either 1) have an experienced helper or 2) keep the group number smaller (I think 2-3 for this-sized project, 3-4 for a smaller, simpler project).
Finally, having everyone do the same project would simplify things. It wasn't really bad when it came to building the pieces, but prep-work could have been sped up if I didn't have to mentally switch gears between projects.
This is definitely something that I'd love to do again, and I'd love to offer suggestions if any of you have been contemplating doing something like this.
Is this something that people would be interested in? Or am I as crazy as I thought I was when the idea was still only known to me?
What a great idea! I would love to share my love of building with my friends! I may have to set up a building party of my own!
ReplyDeleteIt's something I've thought of as well. Instead, we built some kid's furniture for a women/kid's shelter and had friends help out. Some just painted, etc. It was a success and they enjoyed helping for a good cause. Love it! Good job Gina!
ReplyDeleteI have thought about this a lot! I am tired just thinking of all your prep work Gina! You are a great friend to help these ladies with such big projects! The benches look great and I enjoyed reading the process!
ReplyDeleteAny chance you could share the design that you did for the third bench? I need to make one for our bedroom and that would fit in perfectly!
ReplyDelete